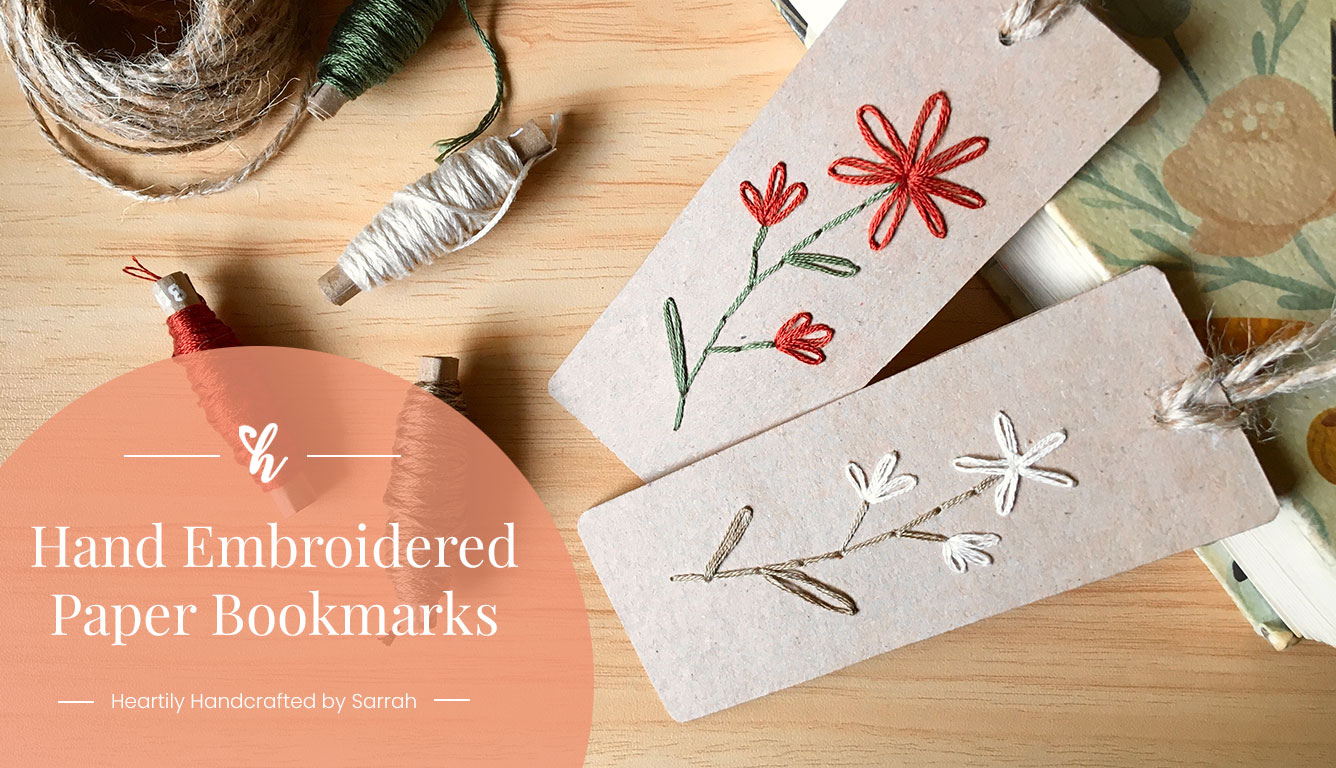
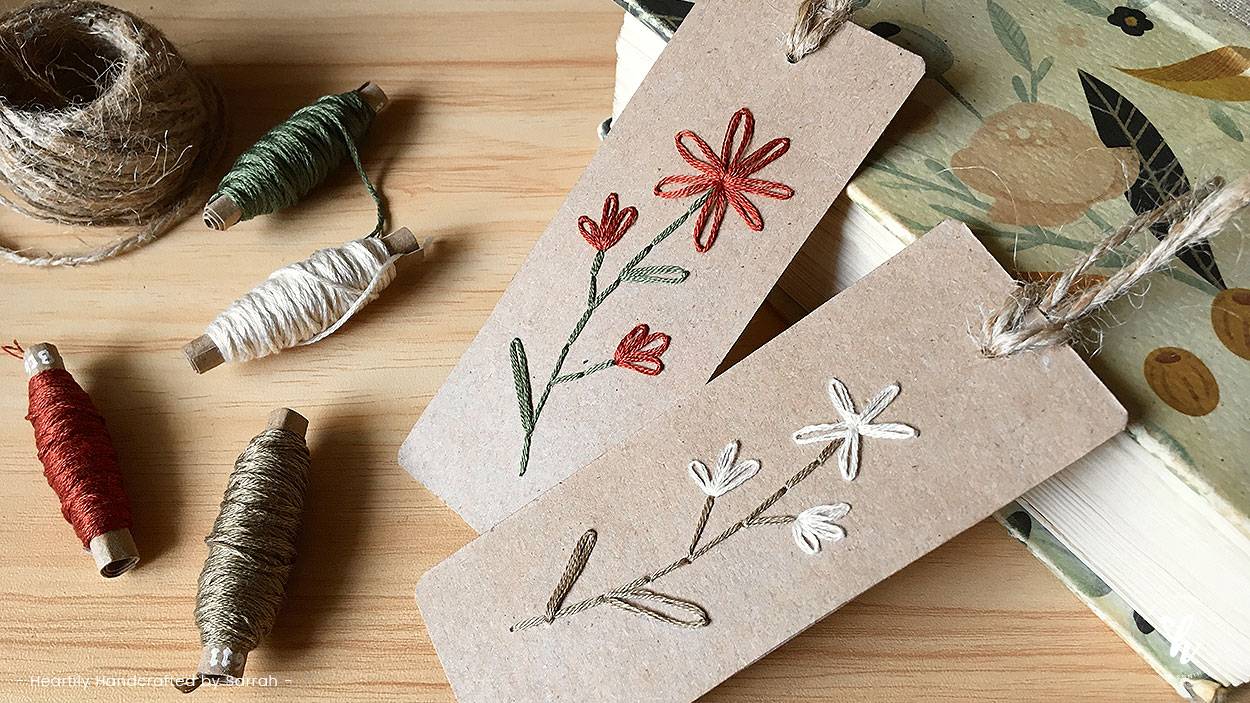
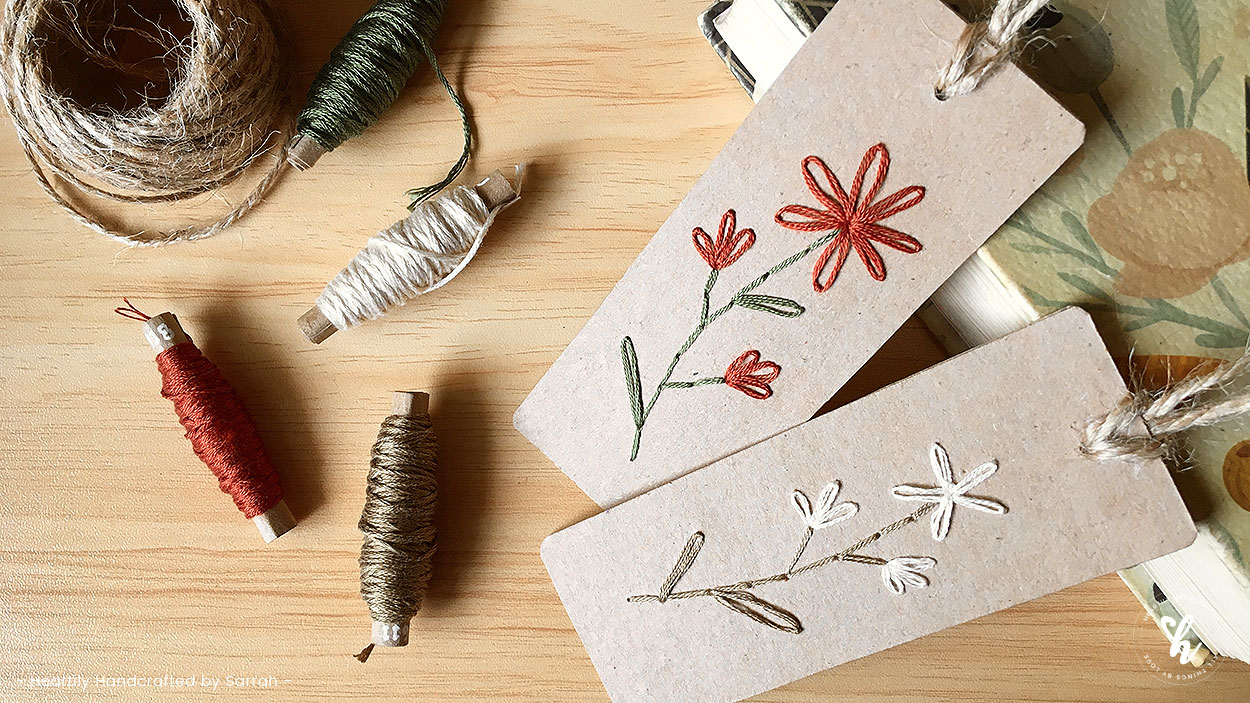
Something embroidered on paper this time! 🔖 Been doing this for gifts, freebies, and greeting cards and finally was able to get some time to take photos and actually capture the process 📸 These recent bookmarks are for my younger sister and for myself 💗 My sister has her birthday a few days ago and stitched a pair of earrings and one of these bookmarks as a gift 🎁
If you’d like to make one also for you or for your friends and family, follow along with the steps. The specific stitches will be best followed thru my video tutorial. You may also like to take some time to browse thru my Tips & Notes section, so you can have a breeze time crafting and stitching. Let’s get started! 😄
Video Tutorial
Materials

- 2 pieces kraft paper card
- Embroidery threads (I used these DMC colors: 611 and Ecru)
- Needles (A sharp and blunt needle, you can just use a sharp needle)
- Scissors
- Pencil
- Ruler
- Glue
- Hole puncher
- Jute twine (or any other twine or ribbon you prefer)
- Thread cutter (optional)
Steps
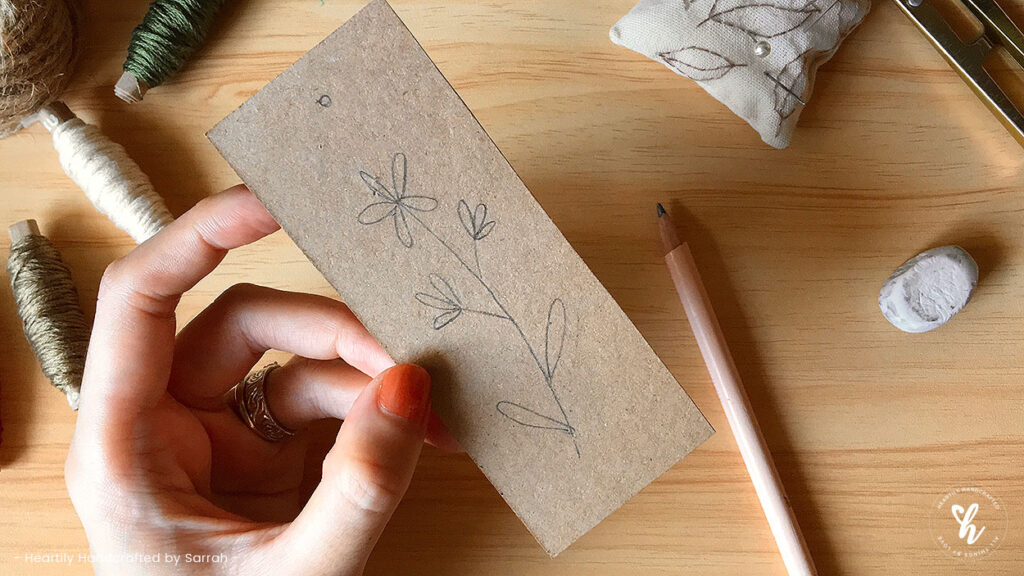
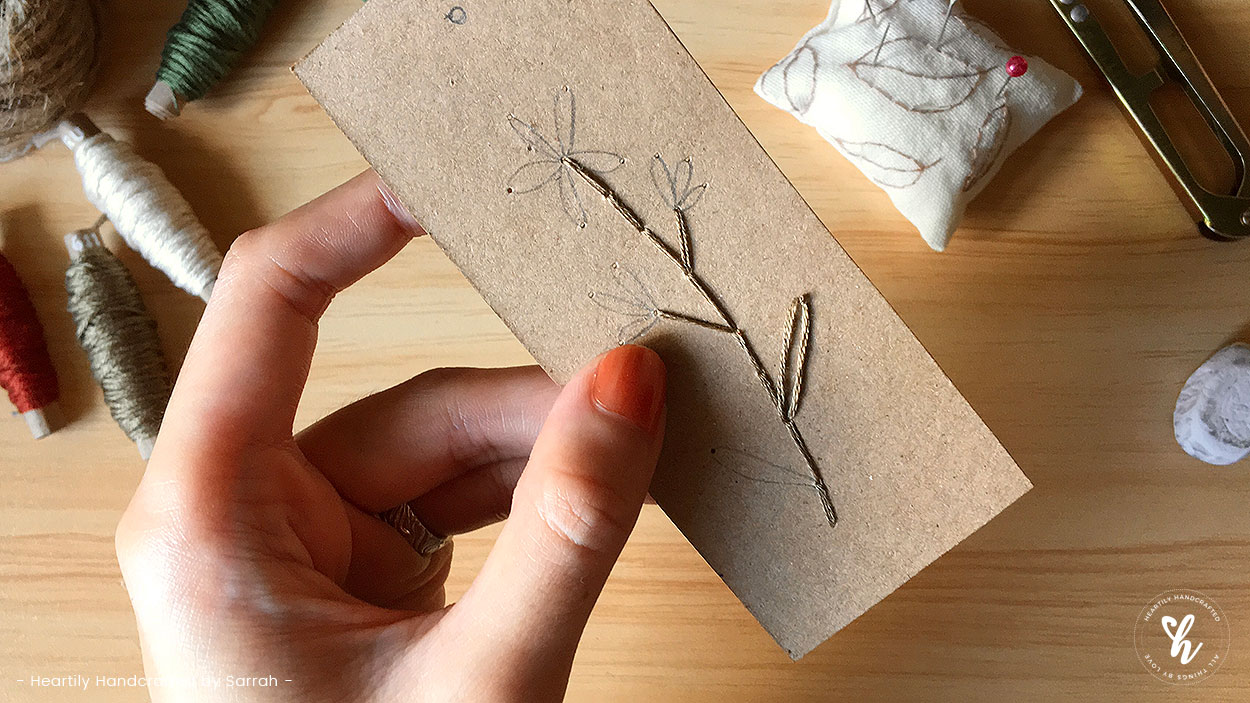
- Get one piece of kraft paper card then draw your design.
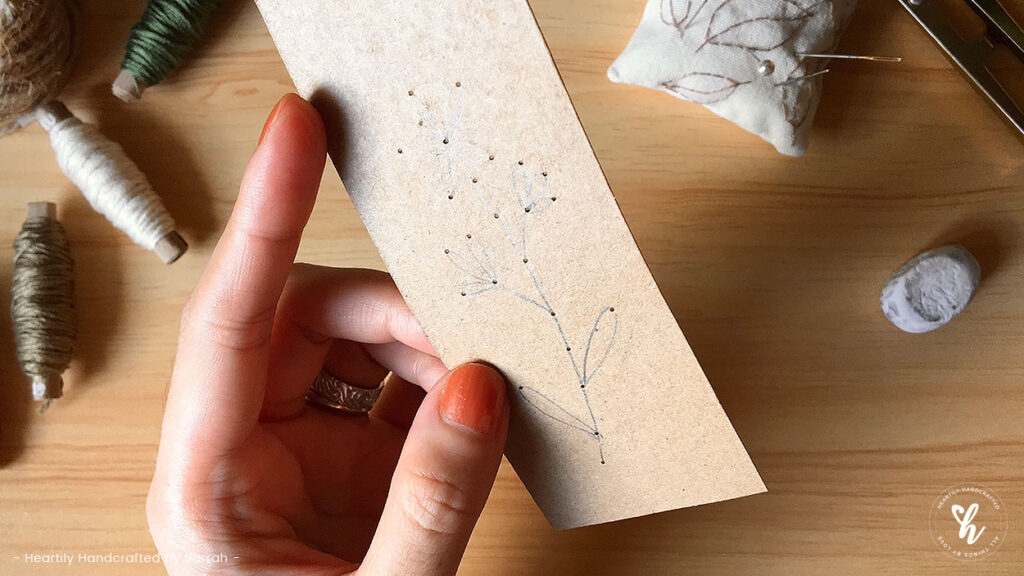
- Use your needle to poke the ends and nodes of your plant design. When you’re done, you can erase your design. Just keep in mind the points where you’ll pass the threads.
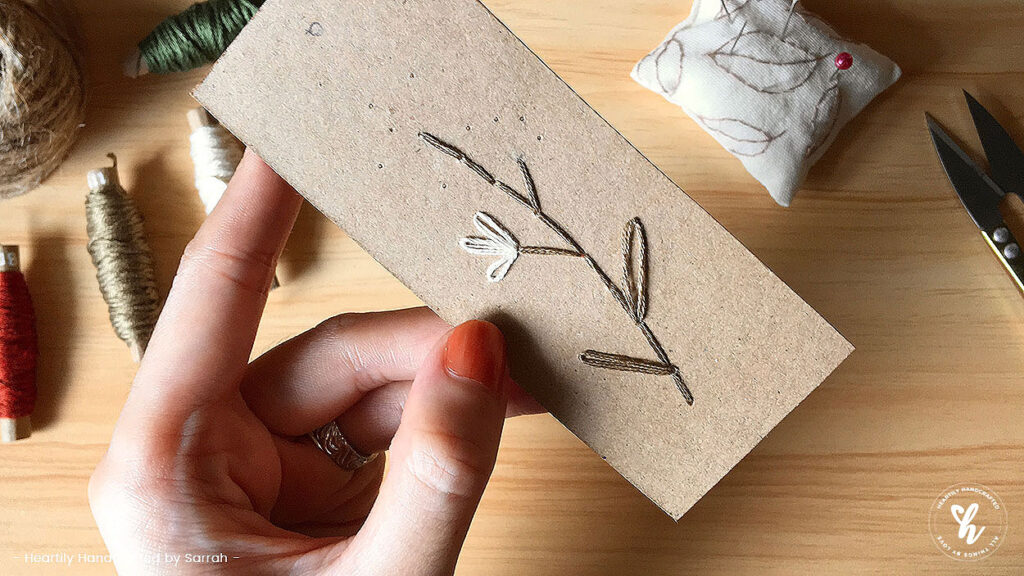
- Now it’s time to embroider! I used 3 strands of threads.
- Before beginning, make a knot at the end of your thread. Make sure to knot only one end.
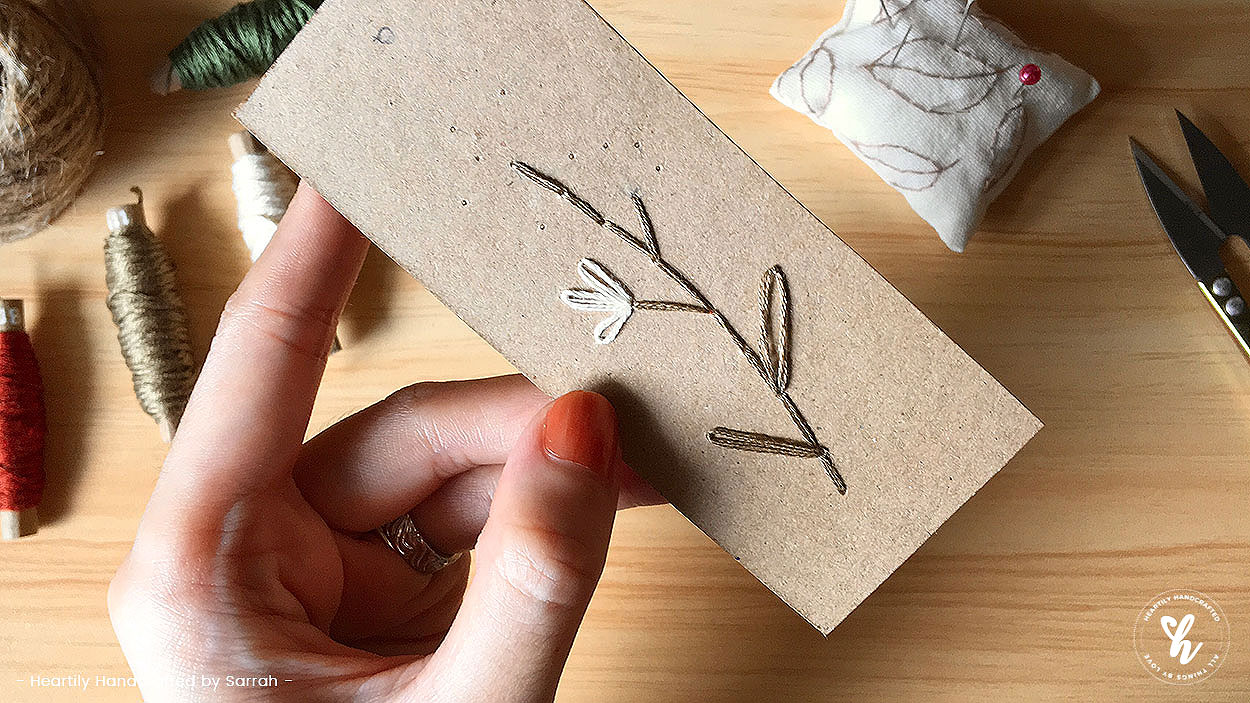
- Let’s first start with the stem. We will be doing a line of straight stitches. Start stitching at the bottom, from the second to the last hole.

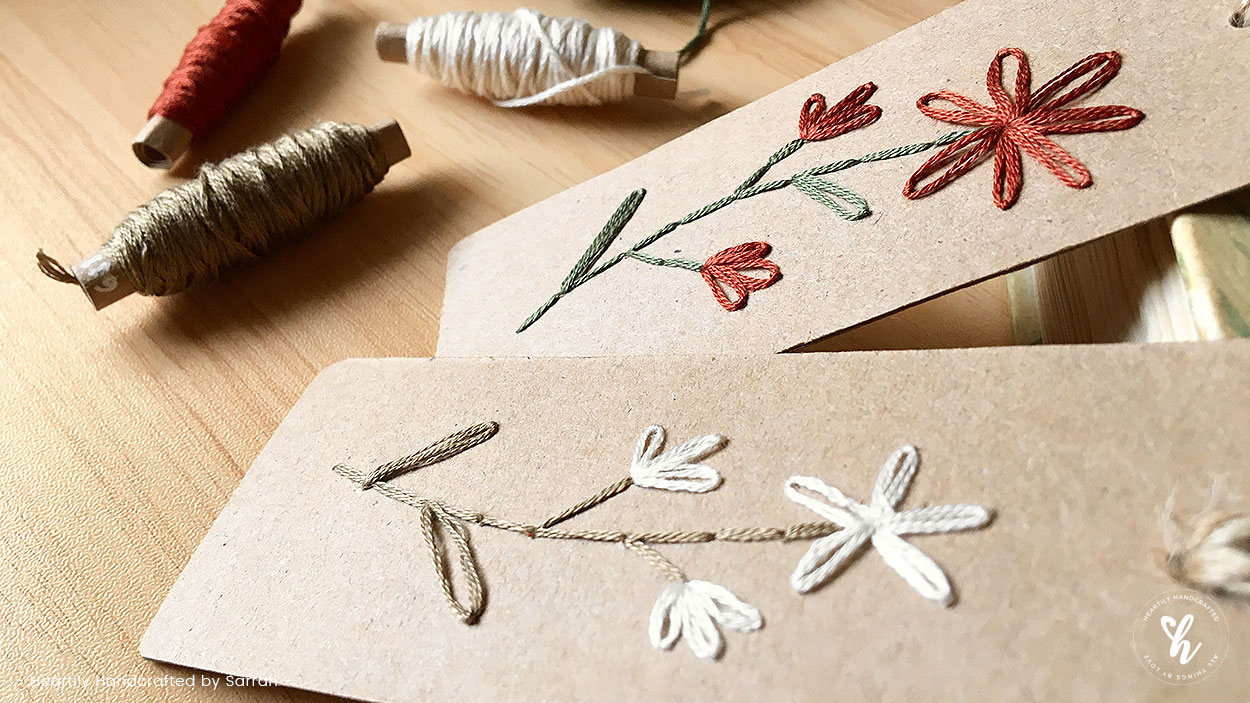
- Then stitch the leaves and flowers using looped stitches, which are single chain stitch and lazy daisy stitch. Single chain stitch for the leaves and small flowers, then lazy daisy stitch for the big flower.
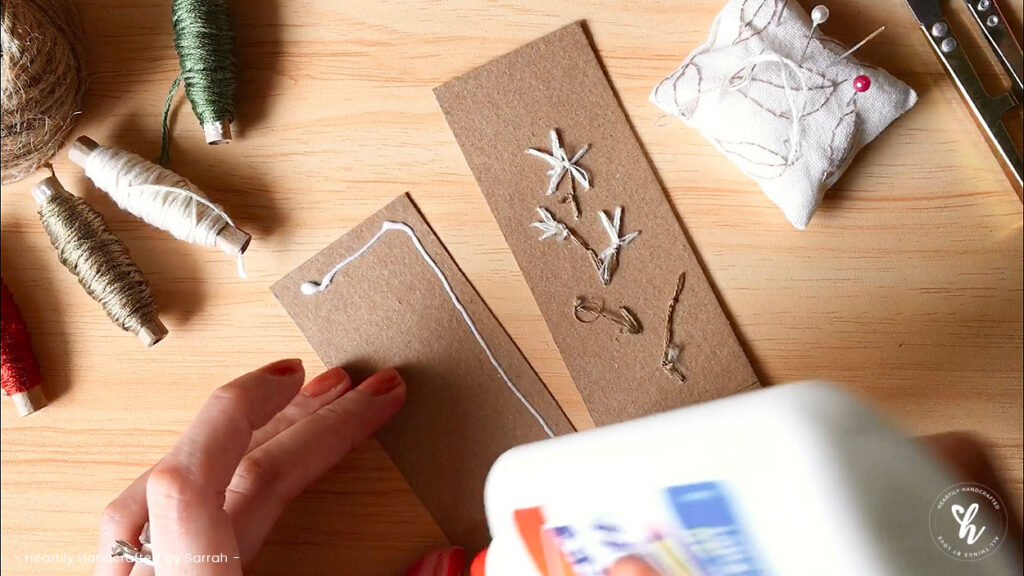
- After stitching, grab the other kraft paper card and glue it on the back of the embroidered card.
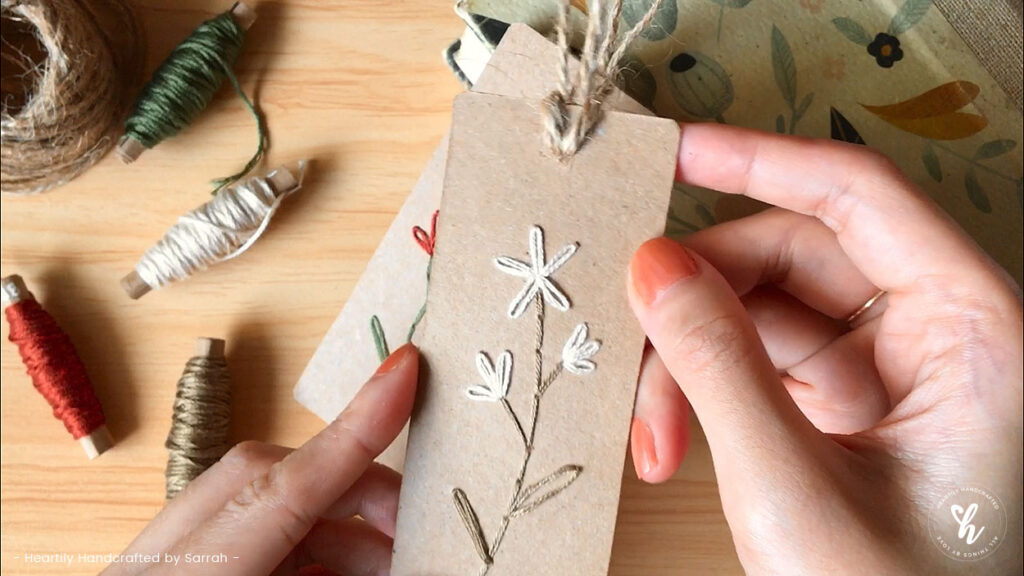
- When the glue is already dry, let’s add the twine. Punch the hole then tie your twine.
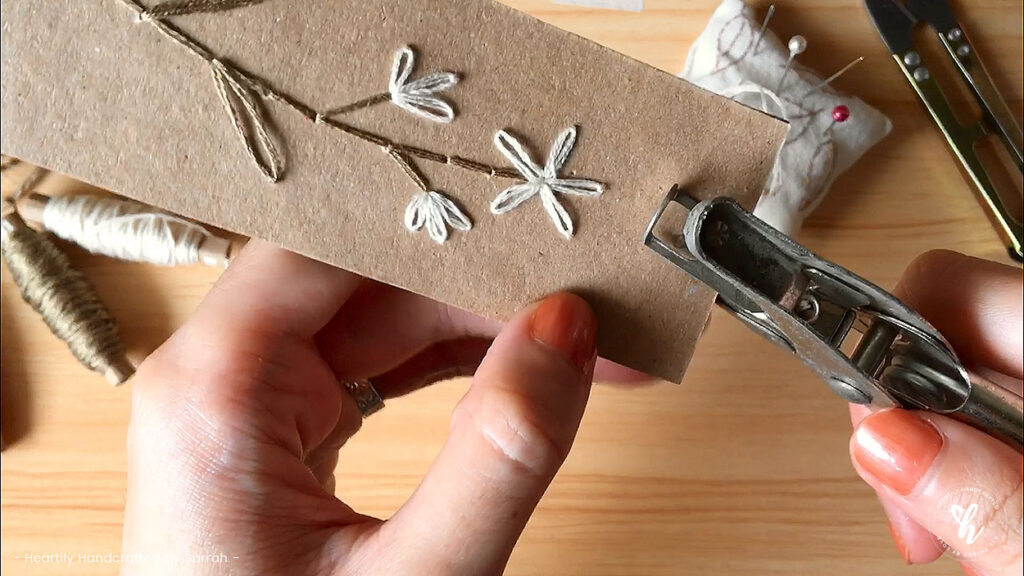
- You may trim the corners of your bookmark and make it rounded if you like like I did. And, now you’re done! Congrats!


Tips & Notes
- You may choose to use a different number of strands specific to your desired effect and design. Practically, for this project, I used 3 strands, so it’ll fit well to the holes and I think gives the right kind of thickness.
- Also, I used two kinds of needles. A sharp needle for poking and a blunt needle when stitching. You can just use a sharp needle, which is very helpful in poking holes.
- When poking and pushing your threaded needle thru, do it in a quick slide motion. And at the same time, make sure you plant your other hand’s thumb and forefinger firmly near the hole. Both methods will avoid making creases to the paper.
- Do a single wrap for knots so that it won’t bulk the bookmark.
- Get creative with other paper cards and twines or ribbons you have on hand! 😉
Photo Time!
Here are more images of the finished embroidered bookmarks 📸 If you’ve tried it, hope you had a great crafting and stitching time 🌟

May you have a creative reading time too! Take care and God bless 💗📚